Rebuilding your LEGO Ninjago sets can be a fun and rewarding experience, especially when you see your favorite characters and vehicles come back to life piece by piece.
Whether a cherished set has seen better days or you’re simply eager to customize your collection, knowing the right restoration techniques makes all the difference.
I’ve found that with a bit of patience and the right approach, even the most complex builds can be revived to their original glory. Plus, restoring these sets often sparks creativity and brings a fresh sense of accomplishment.
If you’ve ever struggled with broken or missing parts, you’re not alone—there are practical solutions that work wonders. Let’s dive into the details and discover how to bring your LEGO Ninjago collection back to its full glory!
Assessing the Condition of Your LEGO Ninjago Pieces
Identifying Damaged and Missing Components
Before diving into any rebuilding process, it’s crucial to thoroughly inspect your LEGO Ninjago set. I usually start by sorting the pieces on a clean surface and checking for any cracked, discolored, or warped bricks.
Missing parts are often the trickiest because they can halt progress if you’re aiming for an authentic restoration. Sometimes, minifigure accessories like weapons or helmets go missing, and those small bits really affect the overall look.
I’ve found that using a checklist based on the original set’s inventory helps me keep track of what’s missing or damaged. This method also reduces frustration since I can plan replacements ahead of time.
Cleaning Techniques to Restore Shine
LEGO bricks tend to accumulate dust and grime over time, especially if they’ve been stored for years. I usually soak the pieces in warm, soapy water for about 20 minutes, which loosens dirt without damaging the plastic.
After soaking, I gently scrub them with a soft toothbrush to reach crevices without scratching. It’s important to air-dry the bricks completely before rebuilding because residual moisture can cause them to stick together awkwardly or even encourage mold growth.
For stubborn stains, a bit of isopropyl alcohol on a cotton swab works wonders, but be careful not to overdo it to avoid discoloration.
Organizing Pieces for Efficient Rebuilding
Once the bricks are clean and dry, I organize them by color, size, and function. This step saves a ton of time during reconstruction. For example, grouping all the black ninja swords together or separating vehicle parts from minifigure components helps me quickly find what I need.
I’ve even started using small containers or resealable bags for this purpose, especially when working on larger sets like the Destiny’s Bounty. This way, even if I need to pause the project, everything stays in order and ready to pick up later without confusion.
Strategies for Replacing Missing or Broken Parts
Finding Official Replacement Bricks
When it comes to missing pieces, LEGO’s official “Pick a Brick” service is a lifesaver. You can search by part number or description to order exact matches, which guarantees compatibility and color accuracy.
I’ve ordered several unique elements this way, like Ninjago-themed accessories, and the quality has always met my expectations. It’s a bit more expensive than buying bulk lots, but for key components, it’s worth the investment to maintain the set’s integrity.
Using Third-Party Alternatives Wisely
Sometimes, official replacements are out of stock or unavailable, especially for older sets. In those cases, I turn to reputable third-party sellers or brick marketplaces like BrickLink.
While the quality varies, many sellers offer nearly identical parts that work perfectly for restoration. I always read reviews and check photos before purchasing, since some clones may have slight color or texture differences.
If you’re restoring for play rather than display, these alternatives can be a budget-friendly option.
Creative Fixes for Non-Replaceable Pieces
Occasionally, you might encounter a rare or custom piece that’s impossible to replace. In my experience, minor damage like a missing corner or a bent connector can sometimes be fixed with gentle heat application using a hairdryer or warm water, carefully reshaping the plastic.
For more severe issues, I’ve improvised by combining smaller bricks to mimic the original shape or used modeling putty to fill gaps and then painted over with matching acrylic paints.
This approach takes patience but can breathe new life into otherwise unusable parts.
Mastering Reassembly for Complex Builds
Following Instructions vs. Customizing
Rebuilding your Ninjago set can be as straightforward or as creative as you want. Personally, I find following the original instruction manual helps me get the base structure right, especially for intricate vehicles or large dragons.
However, once the main build is complete, I like to tweak details or add custom elements to personalize the set. For example, swapping out weapons or adding stickers can make the model feel fresh and unique.
This blend of restoration and customization keeps the process engaging and fun.
Step-by-Step Rebuilding Tips
Breaking down the rebuild into manageable sections is key. I start with the core frame or chassis, ensuring structural stability before adding decorative elements.
It’s tempting to rush, but I’ve learned that patience avoids forcing pieces and damaging them. Using a sorting tray or mat helps me keep the next steps visible and accessible.
Also, periodically testing moving parts like wheels or hinges during assembly ensures everything functions smoothly before finalizing the build.
Keeping Track of Progress and Adjustments
I like to take photos at various stages, not only to document progress but also to help if I need to backtrack or adjust any sections. Sometimes, I realize a piece fits better in a different orientation or that I missed a step.
Having a visual record makes troubleshooting easier. Plus, sharing these photos with fellow LEGO enthusiasts online has led to great advice and tips, enhancing my restoration skills over time.
Protecting and Displaying Your Restored Collection
Choosing the Right Display Environment
Once your Ninjago set is rebuilt, protecting it from dust, sunlight, and accidental damage is essential. I recommend displaying the set in a glass cabinet or on a shelf away from direct sunlight to prevent fading.
Humidity control is also important; I keep a small dehumidifier nearby in my display room to avoid plastic warping. These precautions preserve the colors and structural integrity for years to come.
Maintenance Tips to Keep Your Set Pristine
Regular dusting with a soft brush or microfiber cloth prevents buildup that can dull the bricks. For more thorough cleaning, I sometimes carefully disassemble small sections and repeat the gentle washing process.
Avoid harsh chemicals or abrasive materials that could scratch the plastic. If you have minifigures with decals, handle them gently to avoid peeling. Periodic inspections help catch any loose or damaged pieces early, so you can fix them before they become bigger problems.
Creative Display Ideas to Showcase Your Collection
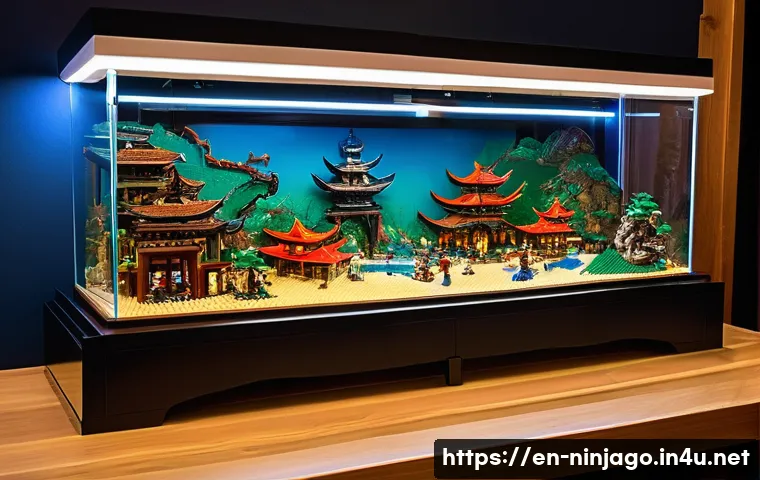
Displaying your restored LEGO Ninjago sets can be a creative project in itself. I’ve experimented with themed backdrops, such as printed scenes from the Ninjago universe, which add depth and context.
LED strip lighting inside cabinets highlights the vibrant colors and intricate details. Some collectors even build custom stands or dioramas to feature multiple sets together, creating dynamic storytelling scenes.
The key is to balance protection with visibility, so your hard work gets the appreciation it deserves.
Enhancing Your Experience with Community Resources
Joining Online LEGO Forums and Groups
Connecting with fellow LEGO enthusiasts has been invaluable in my restoration journey. Online forums and social media groups dedicated to LEGO Ninjago provide a wealth of knowledge, from rare part sourcing to advanced building techniques.
Sharing photos and progress updates often leads to helpful feedback and encouragement. Plus, these communities sometimes organize swaps or sales, making it easier to find those elusive pieces.
Learning from Expert Tutorials and Videos
I’ve found watching detailed rebuild tutorials on platforms like YouTube incredibly helpful, especially for complex sets. Experts often share tips on tricky assembly steps, alternative building methods, or customizations.
Seeing the process visually complements the instruction manual and helps avoid common mistakes. Many creators also review rare sets, giving insights into parts and possible modifications that can inspire your own project.
Participating in LEGO Events and Meetups
Attending local LEGO conventions or meetups offers hands-on experiences and networking opportunities. You can see other collectors’ restored sets up close, exchange ideas, and even get advice directly from seasoned builders.
These events often feature workshops or challenges that push your skills further. Engaging in the LEGO community adds a social dimension to your hobby, making restoration not just a solo task but a shared passion.
Understanding Tools and Materials for Restoration
Essential Tools for Brick Care and Assembly
Having the right tools on hand makes a huge difference in restoration quality. A basic brick separator is indispensable for safely disassembling without damaging pieces.
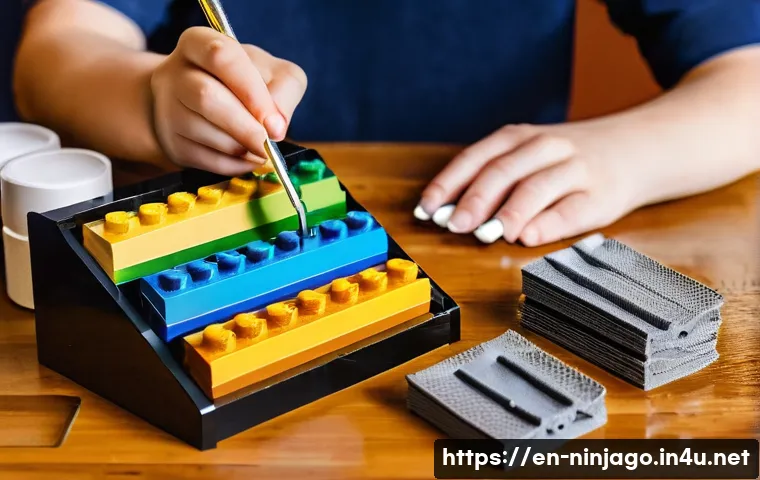
Tweezers help with tiny elements like minifigure accessories, while soft brushes aid in delicate cleaning. I also keep a small magnifying glass to inspect fine details or faded prints.
Investing in these simple tools has made my rebuilds smoother and less frustrating.
Specialized Supplies for Repairs and Customization
For more advanced repairs, I use plastic-safe adhesives sparingly when pieces are irreparably broken, but only on parts not essential for structural integrity.
Acrylic paints and fine brushes come into play when restoring faded colors or recreating stickers. I’ve experimented with decal paper to print custom designs that match the original style.
These materials allow me to maintain the set’s visual appeal while preserving functionality.
Safety and Storage Considerations
When handling cleaning agents or paints, I always work in a well-ventilated area and wear gloves to protect my skin. Proper storage of tools and chemicals keeps my workspace safe and organized.
After restoration, I store extra pieces and tools in labeled containers to prevent loss or damage. Keeping everything tidy not only safeguards your investment but also makes future projects easier to start and complete.
| Restoration Step | Recommended Tools/Materials | Tips for Best Results |
|---|---|---|
| Inspection and Sorting | Checklist, sorting trays, resealable bags | Use original inventory lists; group by color and function |
| Cleaning | Warm soapy water, soft toothbrush, isopropyl alcohol | Soak gently; avoid harsh chemicals; air dry thoroughly |
| Replacement | LEGO Pick a Brick, BrickLink, third-party parts | Verify part numbers; check seller reviews; compare colors |
| Reassembly | Original instructions, photo documentation, brick separator | Follow manual stepwise; take photos; avoid forcing pieces |
| Repair and Customization | Plastic-safe glue, acrylic paints, decal paper | Use adhesives sparingly; match colors carefully; test on spare bricks |
| Display and Maintenance | Glass cabinet, soft brushes, LED lighting | Avoid direct sunlight; dust regularly; use protective cases |
Wrapping Up
Restoring your LEGO Ninjago set is a rewarding journey that combines patience, creativity, and attention to detail. By carefully assessing, cleaning, and organizing your pieces, you set the foundation for a successful rebuild. Embracing both official and creative solutions for missing or damaged parts ensures your collection stays authentic and vibrant. Ultimately, displaying and maintaining your restored sets lets you enjoy the fruits of your hard work for years to come.
Useful Tips to Remember
1. Always start with a detailed inspection and sorting process to identify any damaged or missing parts before rebuilding.
2. Clean your bricks gently using warm soapy water and soft brushes to preserve their original shine without causing damage.
3. Utilize official LEGO services for replacements when possible, but don’t hesitate to explore trusted third-party options if needed.
4. Take your time during reassembly, following instructions closely while allowing room for customization to keep the build fun.
5. Protect your finished set by displaying it in a controlled environment and performing regular maintenance to keep it looking pristine.
Key Takeaways
Effective restoration of LEGO Ninjago sets hinges on thorough preparation, including careful inspection and cleaning. Sourcing parts from reliable channels maintains the set’s integrity, while creative fixes can save rare pieces. Following a structured rebuilding process reduces errors and enhances enjoyment. Finally, proper display and upkeep protect your investment, ensuring your collection remains a source of pride and inspiration for years.
Frequently Asked Questions (FAQ) 📖
Q: What should I do if some parts of my LEGO Ninjago set are missing or damaged?
A: Missing or damaged parts are pretty common, especially with older or heavily played-with sets. First, try checking online marketplaces like BrickLink or the official LEGO replacement parts service—they often have individual pieces available.
Another trick I’ve used is swapping similar parts from other sets or using custom decals to cover minor imperfections. Patience is key here; hunting for the exact piece can take some time, but once you find it, the set feels brand new again.
Q: How can I prevent damage while taking apart and rebuilding my LEGO Ninjago sets?
A: One mistake I made early on was pulling pieces apart too roughly, which sometimes led to cracks or stress marks. The best approach is to use a proper LEGO brick separator—it’s a small tool designed to pry apart stubborn pieces safely without damaging them.
Also, work slowly and avoid forcing parts. When rebuilding, sorting pieces by type and color beforehand really speeds things up and reduces frustration, making the whole process much more enjoyable.
Q: Are there creative ways to customize my rebuilt LEGO Ninjago sets?
A: Absolutely! Customizing is one of the most rewarding parts of rebuilding. I like to mix and match parts from different sets to create unique vehicles or characters.
Adding small accessories like stickers, custom prints, or even LED lights can bring your creations to life. Don’t be afraid to experiment with new color schemes or alternative builds—you might discover a design that’s even cooler than the original.
It’s a fun way to make your collection truly your own.